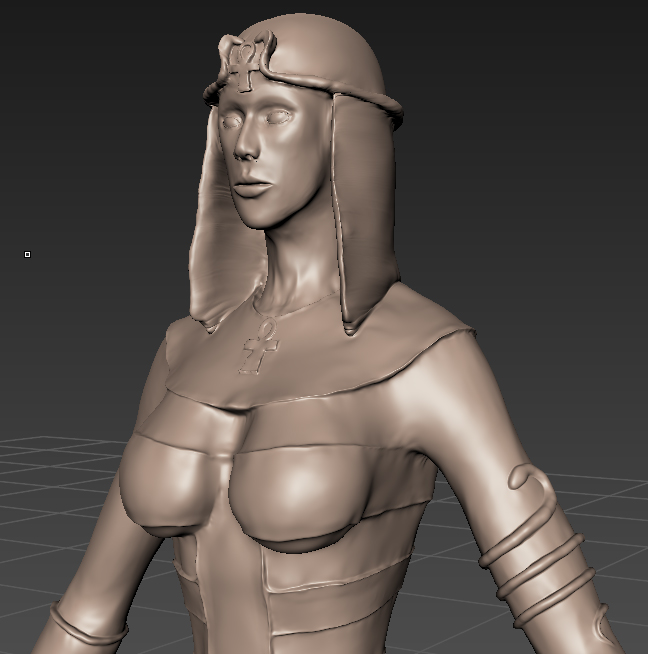
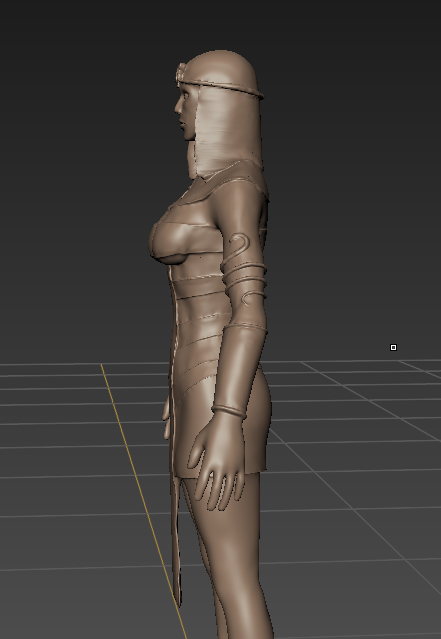
My second deliverable is a 3D model of the vampire queen character sculpted in Mudbox, screen-shots were edited in photoshop. I started with the base model for a male human and started some major re-shaping.
|
I have learned a lot in the process of using Mudbox to sculpt 3D figures and often through trial and error. For example, when distorting the mesh far out of shape, it is good to gather the mesh lines together beforehand using pinch and/or grab tools. This gives the distorted area more polygons to work with and more scope to re-shape and add detail.
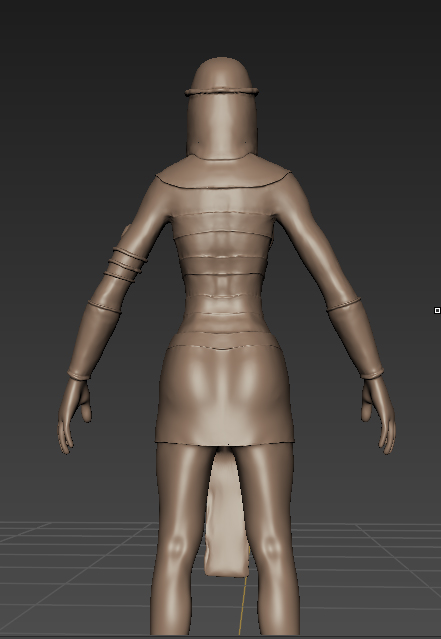
The loincloth-style front of the outfit and the headdress were particularly difficult to sculpt as the mesh was very distorted and i struggled with the limited poly count in the area that I stretched. I should use the gathering method more in early stages of reshaping, in hindsight. |
|
|
I kept the design and research to hand to inspire and inform the modelling. I tried to replicate the designs as accurately as possible so that it could serve as accurate 3D reference material when developing other art or the base model for a future project. I would love to colour the model and maybe even rig it for posing and animation, if the opportunity arose.
|
|
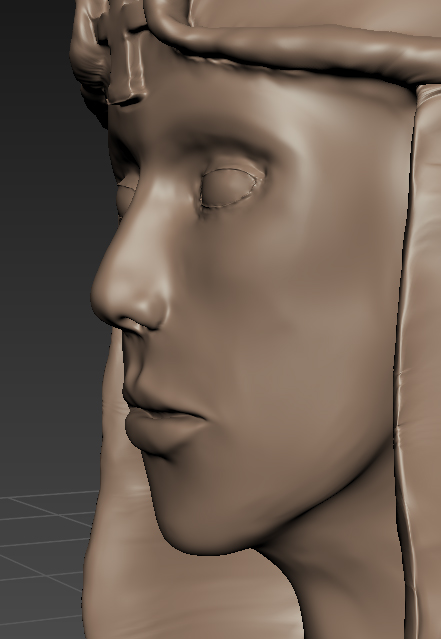
Creating a realistic human female figure was very challenging, especially as I began with a male default shape. I used several sources of reference and learnt a lot about the distinctions that make a person look masculine or feminine, besides the obvious. It took a lot of reshaping to make the face look suitably feminine and as beautiful as i could manage. The grab tool came in handy for adjusting the position of features and head shape. I am not entirely happy with the body-shape and proportions in the end but as one of my first few projects in Mudbox, I learned a lot and could probably do much better if I were to attempt this again. There are several places where I struggled with the mesh and created ripples, distortions and irregular edges but as a whole this could still make very useful reference material.
|
|
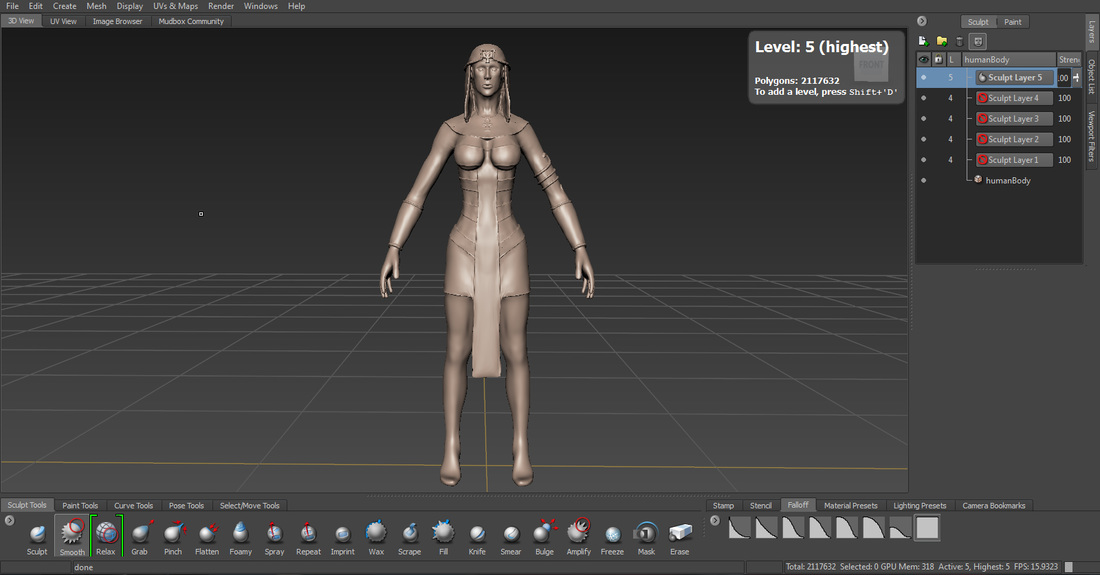
I had to increase the detail level to sculpt cleanly and increased the sub-divisions to level 5, with a poly count of over 2.1 million. This helped greatly with smoothing, creating clean edges and especially with areas that were particularly distorted from the original shape. I considered that opening the lips a little would help clearly define the mouth and may make later projects with animation more practical.